I have received a couple of questions over the past few weeks regarding how to properly get SimpleMembership to work with an MVC3 application. While it is pretty straightforward, the purpose of this post is to serve as a step-by-step “How To” setup SimpleMembership with an MVC 3 application from start to finish.
The following 4 simple steps will get you up and running with SimpleMembership in your MVC3 application in a matter of minutes. We’ll go into each step in more detail below.
- Create new Mvc3 Internet Application or use an existing one.
- Create your SqlServer, SqlExpress or SqlCompact4 database (we’ll be using SqlCompact4 in this example)
- Update Web.config with connection string to point to your database from step 2
- Install & Configure SimpleMembership.Sample package
Creating your MVC 3 Application
- Select File > New Project and Select ASP.NET MVC 3 Web Application.
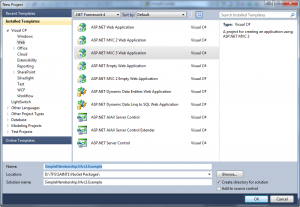
- Pick your desired folder location and click Ok.
- Next, make sure Internet Application is selected and Razor is the View engine.
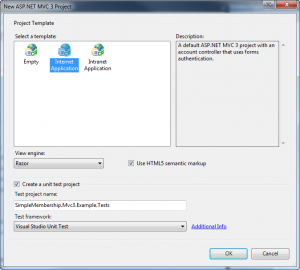
- In this case, we chosen to create a unit test project automatically for testing purposes.
- Choose OK to create your project.
Creating your database (SqlCompact4)
- Before we do anything else, we are going to create a SqlCompact4 database rather than using SQLExpress which is the default for new projects.
- To do so, right-click the App_Data directory and select Add > New Item.
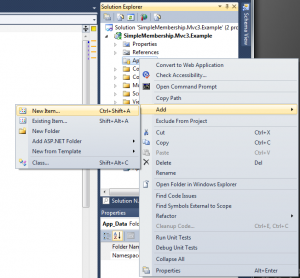
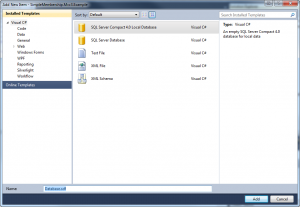
- In the next dialog, select SQL Server Compact 4.0 Local Database, use “Database.sdf” as the filename and click Add.
Updating Web.config connection string
Now that our database is created, we need to update our connection string in Web.config to point to our SqlCompact4 database we just created.
- Open Web.config and locate the connection string named “Application Services”.
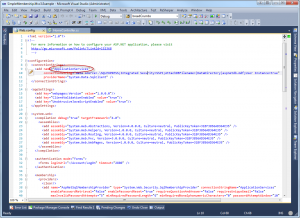
- Next, change the “Application Services” connectionString and providerName to the following:
<add name=“ApplicationServices“ connectionString=“data source=|DataDirectory|\Database.sdf“ providerName=“System.Data.SqlServerCe.4.0“ />
Installing & Configuring SimpleMembership
Now, that we have our application ready, SqlCompact database created and ready to go, now we can install SimpleMembership. For the sake of simplicity, I’m going to install the SimpleMembership.Mvc3.Sample package which include the sample account controller pre-wired for use with SimpleMembership.
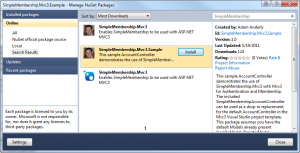
- In Visual Studio, navigate to Tools > Library Package Manager > Manage NuGet Packages.
- Select Online from the left-hand pane and type in SimpleMembership in the search box at the top right.
- Select the SimpleMembership.Mvc3.Sample package and click Install.
- Next, delete the existing Controllers/AccountController.cs file that Visual Studio created for you.
- Rename Controllers/SimpleMembershipAccountController.cs to AccountController.cs
- Open App_Start/SimpleMembershipMvc3.cs and update it to point to the “ApplicationServices” connection string or your appropriate connection string.
That’s It!
You’re application is now ready to use SimpleMembership and you have a fully-functional AccountController.cs pre-wired to use the SimpleMembership API.
Enjoy!
Please post a comment if you have questions or run into issues.
The code is available here: SimpleMembership.Mvc3.Example.zip